Dit artikel is in het Engels geschreven. Hulp nodig bij dit onderwerp? Neem contact op.
Many administrators use the Microsoft Quick Assist tool to support users. The application used to be a part of the operating system itself, until Microsoft decided to move it to the Microsoft Store and also let it use the Microsoft Edge WebView2 component. See the following news article with more background information: Windows admins frustrated by Quick Assist moving to Microsoft Store (bleepingcomputer.com)
This created two issues for administrators:
- The built-in application did not work anymore and would prompt you to update the application. Most end-users did not have such rights.
- The new Quick Assist application needs the Microsoft Edge WebView2 component, which is not always installed on a machine.
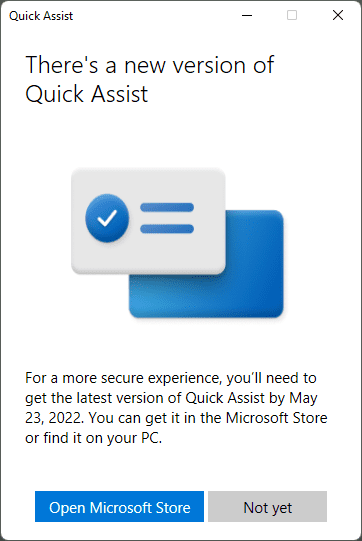
We also had these issues and were unable to fix the Quick Assist update prompt on our client's Citrix environment. Even if you had the application pre-installed and tested on your golden image, it would not work!
The notification would look something like this:
Our solution to the problem
During the troubleshooting it became clear that no matter what we did in our golden image (we use non-persistent VDI desktops with Citrix), the Quick Assist application would keep prompting us with the update window.
To overcome this issue we did the following:
- Make sure that Microsoft Edge WebView2 is preinstalled in the golden image.
- Ensure the appxbundle and the PowerShell script (explained later) are in a location on the C:\ drive.
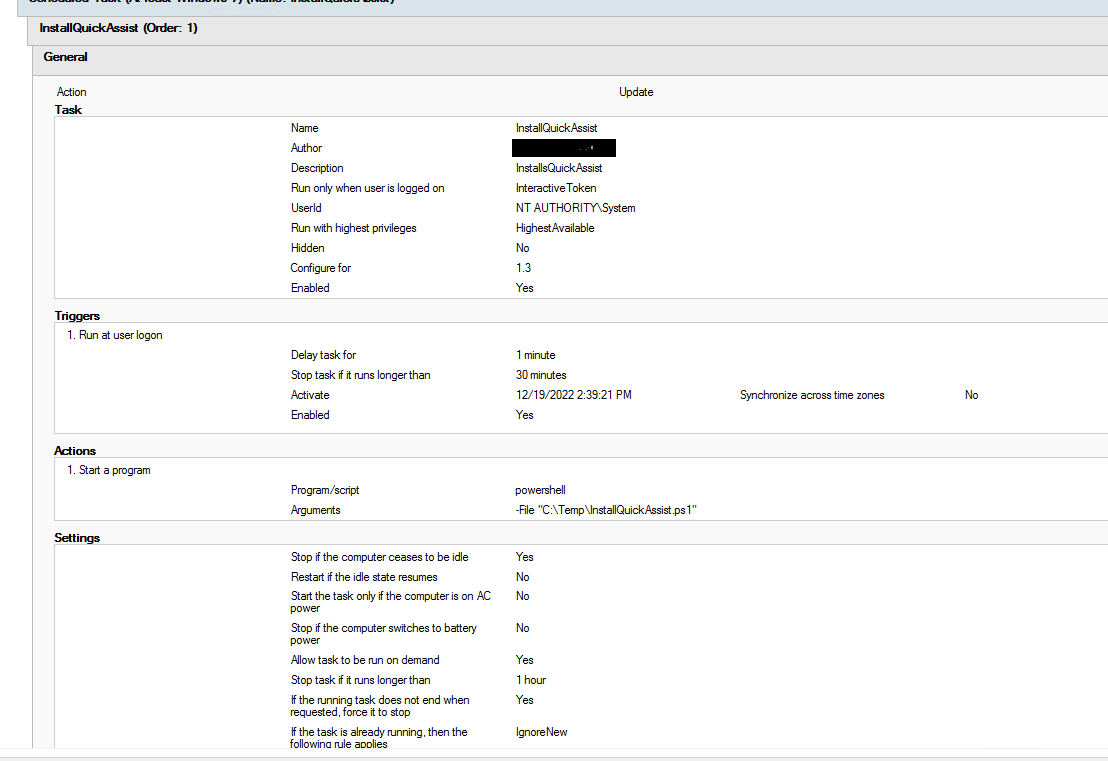
- Create a scheduled task to trigger the PowerShell script 1 minute after user logon.
In order to download the appxbundle of the Quick Assist application it is important to do the following two steps:
- Grab the URL of the Quick Assist application from the Microsoft Store. At the moment of writing the URL is: Quick Assist – Microsoft Store
- Navigate to Microsoft Store – Generation Project (rg-adguard.net) and paste in the URL of the Quick Assist Store link. Scroll all the way down and download the .appxbundle file.
Now that you have the installation file, add it to your golden image process to store it on the C:\ drive. The next step is to edit the PowerShell script with your own specifics and also copy this file to the C:\ drive.
Start-Transcript -Path "C:\Temp\$env:username-Log.txt" -Force
Remove-WindowsCapability -Online -Name 'App.Support.QuickAssist~~~~0.0.1.0' -ErrorAction 'SilentlyContinue'
Add-AppxProvisionedPackage -Online -SkipLicense -PackagePath 'C:\Temp\MicrosoftCorporationII.QuickAssist_2022.825.2016.0_neutral_~_8wekyb3d8bbwe.appxbundle'
Stop-Transcript
I added some small logging so you can see that the removal of the old Quick Assist and the installation of the new Quick Assist worked.
The last step is to create a scheduled task which runs this PowerShell script under the SYSTEM account, with a trigger to start after a user logs on with a 30 second or 1 minute delay (results may vary).
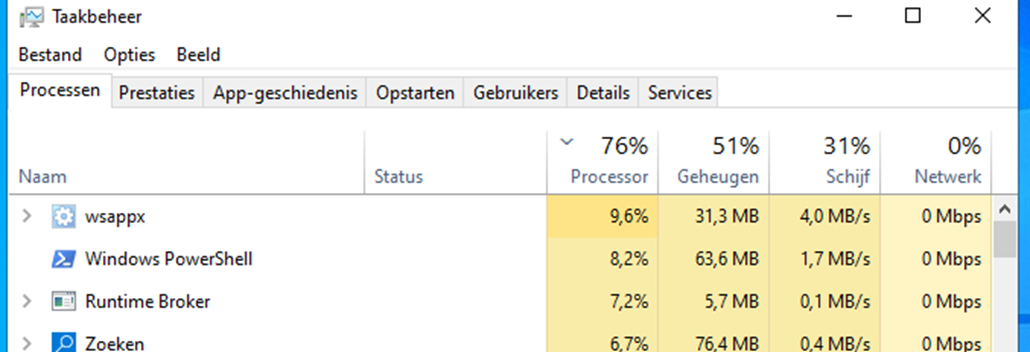
The end result is that you can see the Quick Assist application being installed in Task Manager, which puts some extra load on your machine while it runs.
And happy users, because the application will now start! If you have found another solution to this problem or have suggestions, please let us know.